Deploy Node.js Azure Function from Visual Studio Code
By Mirek on (tags: Azure Functions, Node.js, Visual Studio Code, categories: azure, architecture)Today we will implement a Node.js based API and deploy it as Azure Function using Visual Studio Code. Keep reading…
For those who dont yet know what Microsof Azure Functions are I recommend reading full Microsoft documentation available here. Basically, Azure Functions allow to deploy portion of your functional code (function) on MS Azure infrastructure and make it available under publicitly accesible endpoint. You can develop your code in many languages like C#, Java, JavaScript and so on.
In this Article we will deploy small samle Azure Function. The code will be based on Node.js and we will use solely Visual Studio Code to develop and deploy.
In the first step, make sure you have an active Azure Subscription. To create a free subscription one go here. Also make sure you have Node.js installed on your machine.
Next create new folder named MyAzureFunction01 and open a Visual Studio Code in this folder.
Install Azure Functions Extension for Visual Studio Code. Also to be able to run and debug the function in local environment you need to to install Azure Functions Core Tools.
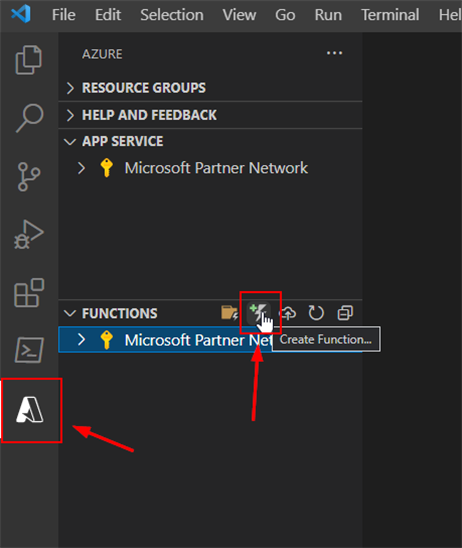
Now we are ready to scaffold new Azure Function project in Visual Studio. On the left toolbar select Azure and then click the action Create Function.
Main VS Code command box will show up where you will select following options.
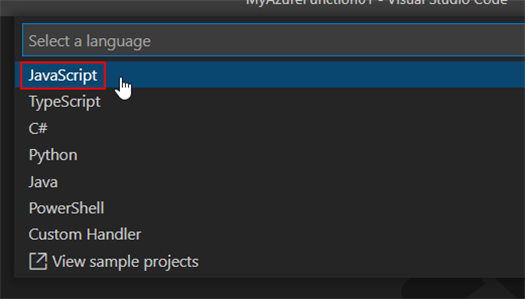
Select JavaScript as Azure Function language
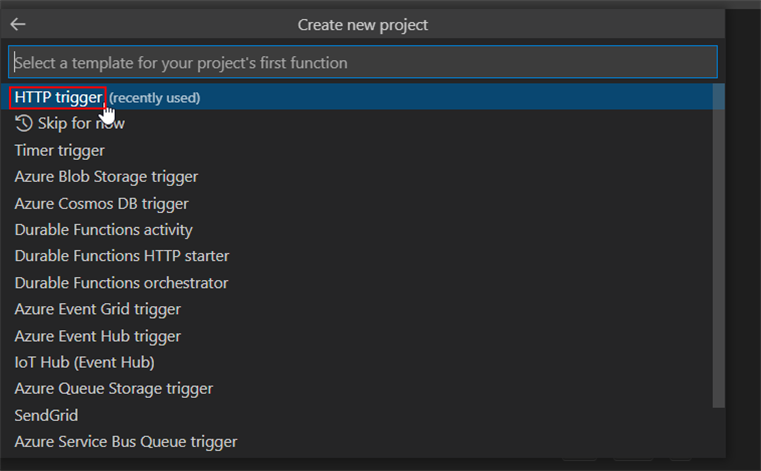
Then select HTTP Trigger as function template
In the next step you provide the actual name for you Azure Function. That will be part of the function endpoint. Type MyName.
For the sake of simplicitly choose Anonymous for authorization level.
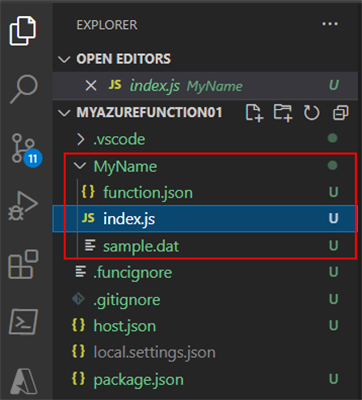
Finally your azure function is being created. New folder named as you function was created.
The index.js file is an entry point for your function. This is the place where all requests are handled. File function.json contains the function configuration and bindings. More on that you can find in documentation.
File sample.dat is a sample data file used in Azure Portal for testing requests. We can delete it.
Now lets modify the content of index.js and add some functionality to our azure function.
module.exports = async function (context, req) {
    try {
        const name = req.query.name;
        const lastName = req.query.lastname;
        if (name && lastName) {
            context.res = { body: `Your full name is: ${name} ${lastName} !` };
        }
        else {
            context.res = { body: 'Provide your name and lastname' };
        }
    }
    catch (error) {
        context.log.error(error);
        throw error;
    }
}
Main Azure Function code must be defined as node.js module exports. This is the entry point for our API. There are couple of parameters passed in to the function which for instance give us a possibility to read request query parameters.
As you can see, our sample function expects the name and lastname variable in request query and returns a full name.
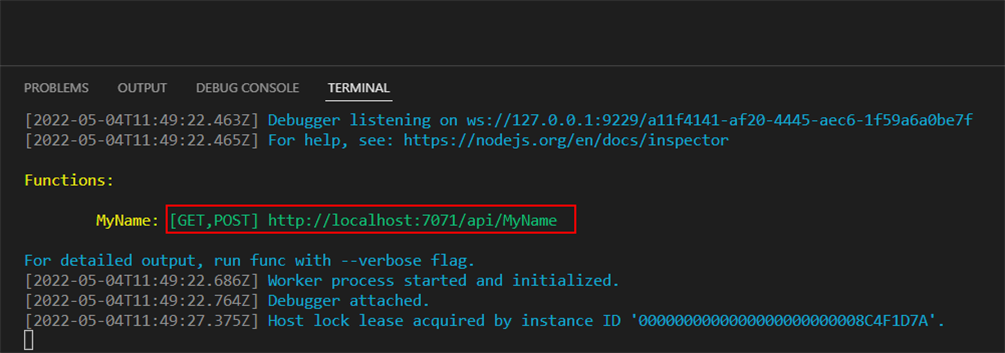
If we have the Azure Functions Core Tools installed we can now simply hit F5 in VS Code and we should have our Azure Function running locally:
Now we can use tool like Postman to query the api locally and we even get the possibility to debug its code in VS Code.
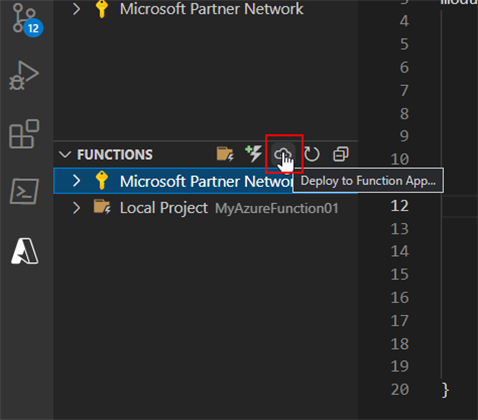
But lets continue and deploy our function to Azure. For that go to Azure toolbar section and use Deploy to Function App option this time
Then select Create new Function App in Azure
and when prompted type in my-sample-af as you Azure Function App name.
In the next step select runtime stack. In this case choose Node.js 16 LTS (or one that match your development version of Node.js)
Then in the last step you need to choose the location for your resources. Select one closest to your place. I choose North Europe.
After that the Azure Function App should start being deployed which may take few minutes.
Once the app is deployed to azure we should be able to query it like so
https://my-sample-af.azurewebsites.net/api/MyName?name=Tom&lastname=Hanks
and get the response as
Your full name is: Tom Hanks !
That’s it, thanks !

 back
back
