CI/CD your Node js Azure Function with DevOps
By Mirek on (tags: azure, Azure Function, CI/CD, DevOps, linux, Node js, Pipeline, categories: azure, architecture, tools, infrastructure)This time a quick guide on how to configure CI/CD on Azure DevOps to develop and deploy Node.js based Azure Function on linux. Keep reading…
Assuming we are developing Azure Function called myspecialfunction which is Node.js based javascript function. We want to configure an Azure DevOps pipeline to deploy this function to linux hosted Azure Function using ZipDeploy.
Preparing Azure environment
For simplicity we will use Azure portal to create the infrastructure, but all this can also be done using for example Azure CLI or Powershell commands as described here.
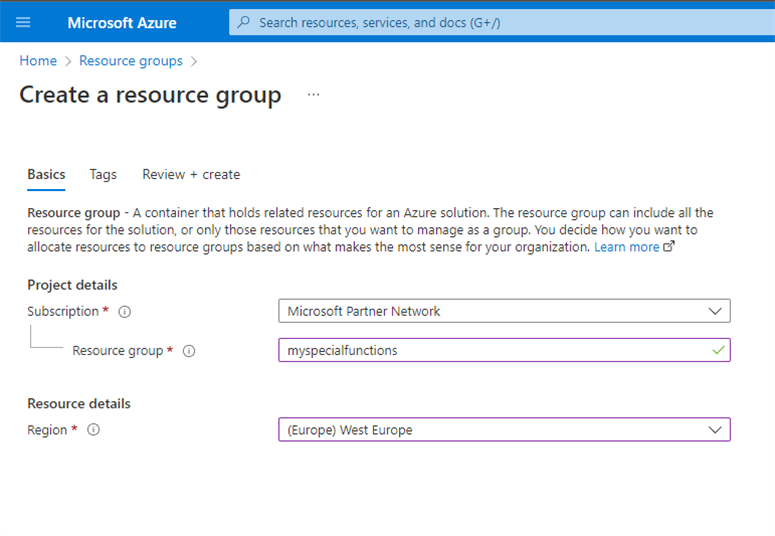
1. Create resource group: Go to Azure Portal, select Resource groups and Create new resource group called myspecialfunctions
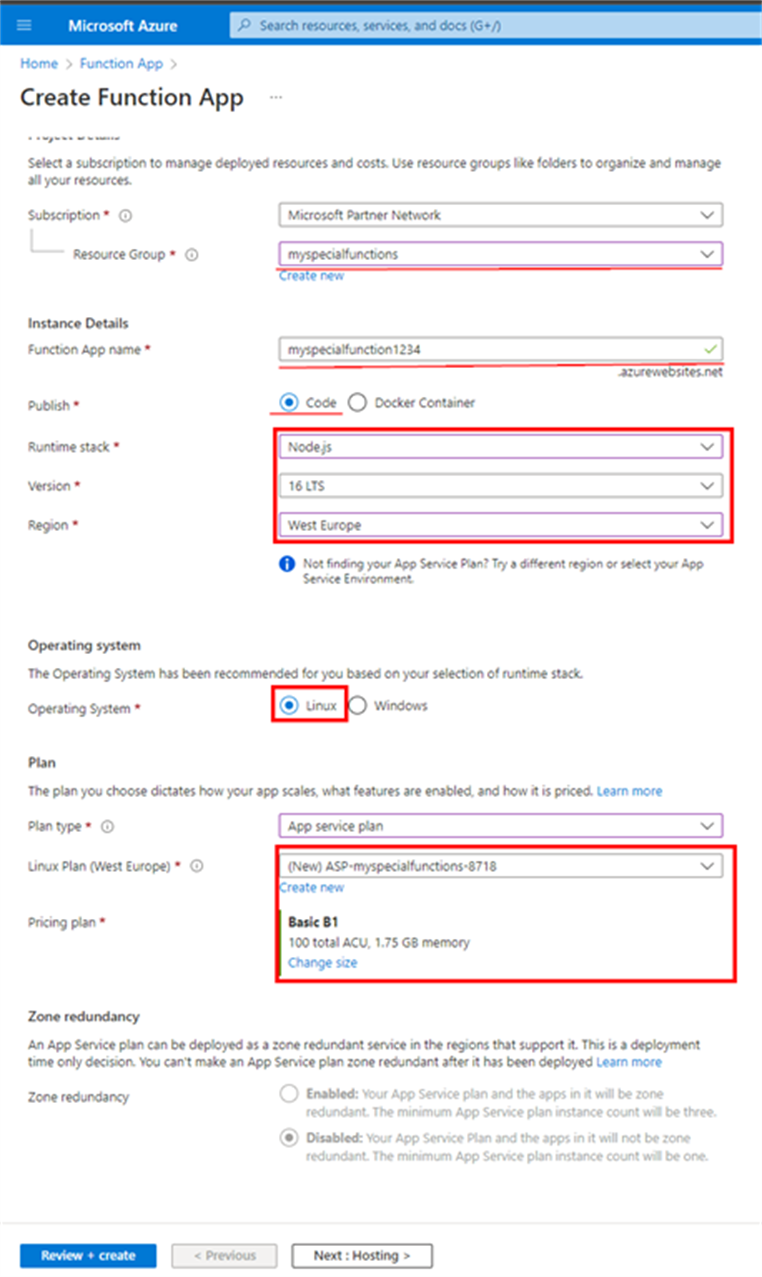
2. Create Function App: Go to Function App and create new Azure Fucntion called myspecialfunction. If that name is not available (it will be part of the function url in fact) then choose some other name and note it. Select the resource group created in previous step and all the settings as shown below.
Important note regarding service plan: You cannot select Consumption (serverless) plan for linux, because running functions from package is not supported for linux for that plan. Choose one of the payed plan, for example B1 as shown above.
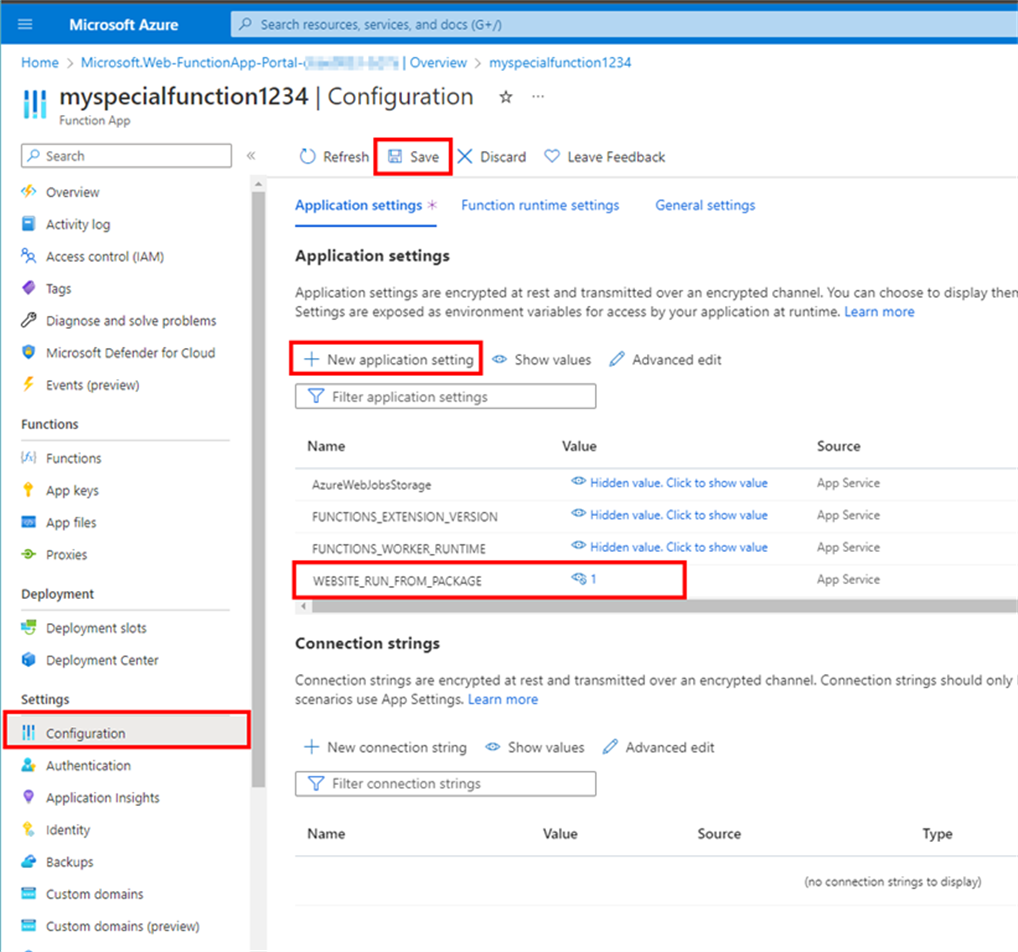
When the Function App is being created we need to configure it to support zip deployment. According to this guide just go to function configuration tab in the Azure portal and add the app setting called WEBSITE_RUN_FROM_PACKAGE with value 1
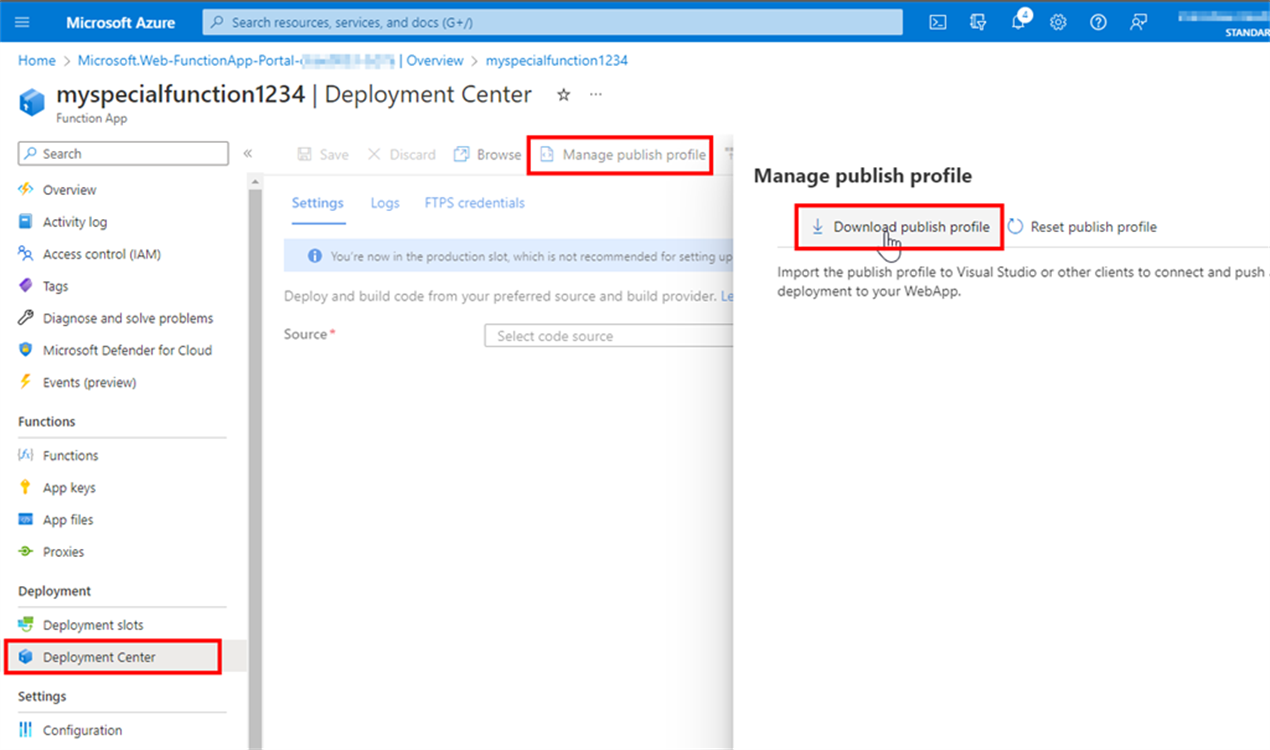
Next we need to get the zip deployment credentials, that we will configure in DevOps as service connection later. The easiest way is to go to Deployment Center and grab the publish profile file
The publish profile is an XML file containing credentials for couple of deployment methods. The one that we take is the Zip deploy part:
<publishprofile
  websystem="WebSites"
  controlpanellink=http://windows.azure.com
  destinationappurl=https://myspecialfunction.azurewebsites.net
  userpwd="G88XqowEpnqFDSoi5p..."
  username="$myspecialfunction"
  publishurl="myspecialfunction.scm.azurewebsites.net:443"
  publishmethod="ZipDeploy"
  profilename="myspecialfunction - Zip Deploy">
</publishprofile>
We will use that in a minute.
Prepare DevOps pipeline
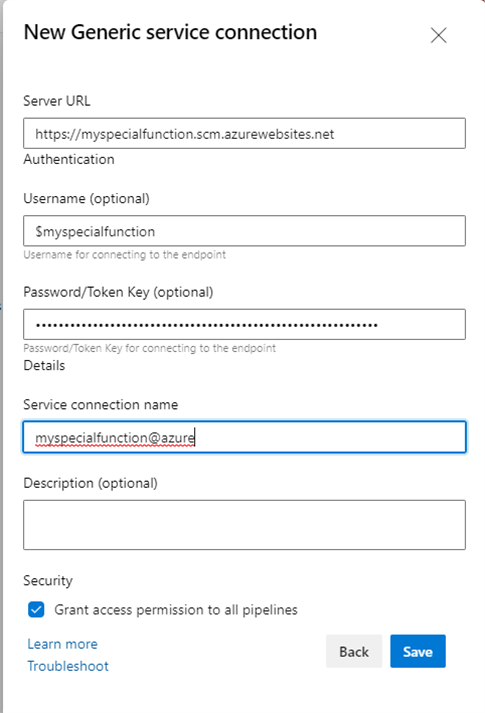
Now go to the DevOps portal, navigate to the project of your function code. Go to project settings and add new Generic service connection in Service connections section. As a server url type in the publishurl with https:// and as a user and password corresponding values from Zip deploy section of publish profile above
Save the service connection and note its name.
Now go to Pipelines and create new pipeline from Yaml starter file. Replace the Yaml content with the following
variables:
  Company:
  Product: specialFunctions
  MajorVersion: 0
  MinorVersion: 1
  ConnectedServiceName: myspecialfunction@azure
  FunctionAppName: myspecialfunction

name: $(MajorVersion).$(MinorVersion).$(Rev:r)

trigger: none

resources:
- repo: self

stages:
- stage: deploy
  displayName: Deploy Azure Function

  jobs:
  - job: deployazure
    displayName: Deploy to Azure

    pool:
      vmImage: ubuntu-latest

    steps:
    - checkout: self
      persistCredentials: true

    - task: CopyFiles@2
      displayName: Copy deployment files
      inputs:
        SourceFolder: ./Source
        TargetFolder: $(Build.ArtifactStagingDirectory)
        contents: |
          **
          !.vscode/**
          !.funcignore
          !.gitignore
          !.dockerignore
          !DockerFile

    - task: Npm@1
      displayName: Install node modules
      inputs:
        command: install
        workingDir: $(Build.ArtifactStagingDirectory)

    - task: ArchiveFiles@2
      displayName: Create archive
      inputs:
        rootFolderOrFile: $(Build.ArtifactStagingDirectory)
        includeRootFolder: false
        archiveFile: $(Build.ArtifactStagingDirectory)/$(FunctionAppName).zip

    - task: AuthenticatedBash@1
      displayName: Deploy archive using Kudu API
      inputs:
        serviceConnection: $(ConnectedServiceName)
        workingDirectory: $(Pipeline.Workspace)
        targetType: inline
        script: |
          curl -X POST -u "$AS_SC_USERNAME:$AS_SC_PASSWORD" --data-binary @"$(Build.ArtifactStagingDirectory)/$(FunctionAppName).zip" "$AS_SC_URL/api/zipdeploy"
Make sure you’ve put correct connection service name created in previous step. Place it at the top of the file as a value for ConnectedServiceName variable.
That’s it. Now you can save your pipeline file, run it and in a couple minutes your Azure Function running linux is ready to go!
Thanks!

 back
back
