Azure Functions
By Dawid on (tags: azure, c#, functions, categories: azure, code)Some time ago Microsoft announced the Azure Functions. What it is exactly? So, Azure Functions are event driven functions which are executed on some occurrence of events but also can be used on-demand.
Couple of benefits of using those:
- development and deployment is easier comparing to normal webapi or webapps
- they allows developers to take action by connecting to data sources or messaging solutions and because of that making it easy to process and react to events
- Azure functions are scale based and on demand – you pay only for the resources you consume
- thanks to intuitive browser based user interface it’s easy to create scheduled or triggered piece of code implemented in a variety of programming languages
Getting started
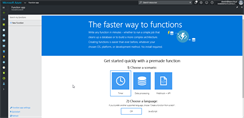
To start using Azure Function first you’ve to login to Azure Functions portal and fallow the instructions. Once we are there and we’ve chosen an option we can write code, configure evens and monitor executions.
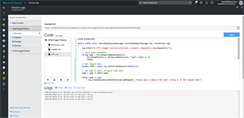
Now, lets try to write simple function using C#. In above dialog choose Webhook + API and C# as function language and click “Create the function”. After that you will be redirected to following code editor.
Let us try to insert a record in Azure SQL database with help of Azure Functions.
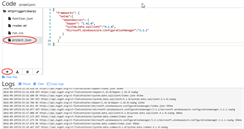
Start with adding new “project.json” file in which we will add all required nuget packages. You can simply copy and paste following JSON content:
1: {
2: "frameworks": {
3: "net46":{
4: "dependencies": {
5: "Dapper": "1.42.0",
6: "System.Data.SqlClient":"4.1.0",
7: "Microsoft.WindowsAzure.ConfigurationManager":"3.2.1"
8: }
9: }
10: }
11: }
Here it how it should looks like:
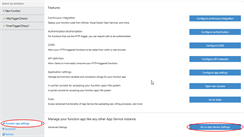
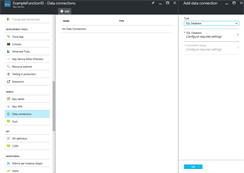
In next step we have to configure your azure sql database connection string with this function app. For that click on Function app settings at the bottom of the functionapp as shown below:
Once connection has been successfully added copy the connection string name (typically MS_TableConnectionString), close the views and navigate back to your function.
Now lets click on our HttpTrigger function, copy the below piece of code and paste it back into Azure Functions C# code editor (change table name and other settings as you need).
1: using System.Net;
2: using Dapper;
3: using System.Data.SqlClient;
4: using System.Configuration;
5:
6: public static async Task<HttpResponseMessage> Run(HttpRequestMessage req, TraceWriter log)
7: {
8: log.Info($"C# HTTP trigger function processed a request. RequestUri={req.RequestUri}");
9:
10: var successful =true;
11: try
12: {
13: var connectionString = ConfigurationManager.ConnectionStrings["MS_TableConnectionString"].ConnectionString;
14:
15: using (var connection = new SqlConnection(connectionString))
16: {
17: connection.Open();
18:
19: var data = await req.Content.ReadAsAsync<LogRequest>();
20: connection.Execute("INSERT INTO [dbo].[Logs] ([Message]) VALUES (@Log)", data);
21: log.Info("Message added to database successfully!");
22: }
23: }
24: catch
25: {
26: successful=false;
27: }
28:
29: return !successful
30: ? req.CreateResponse(HttpStatusCode.BadRequest, "Unable to process your request!")
31: : req.CreateResponse(HttpStatusCode.OK, "Data saved successfully!");
32: }
33:
34: public class LogRequest
35: {
36: public int Id {get;set;}
37: public string Log {get;set;}
38: }
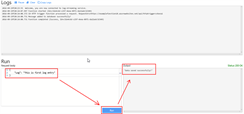
After adding above code ensure that code has been successfully compiled. You should see “2016-09-29T20:18:05.913 Compilation succeeded.” in the Logs section.
Finally – let’s run something! Scroll down to the “Run” box and paste following code:
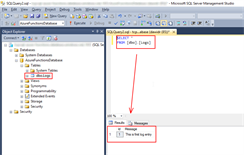
You can verify if that data was correctly inserted into database by running simple query in the SQL Management Studio:

 back
back
